Fundamentals: Styling a Road Network in Studio
By: Erin Quinn
For this week’s #mapwithmapbox challenge we’re going to use the power of expressions in Mapbox Studio to style an entire road network as a single layer. If you didn’t add Rasagy’s Heads Up style to your account last week, just click here:

Already added the style? Start by signing in and navigating to the Style Editor within Mapbox Studio. We’ll be going from the light blue road network (left) to the white roads on the left:


Check out the Studio Manual if you’re new to the interface to get acquainted. Here we go!
1. Hide the existing road layers
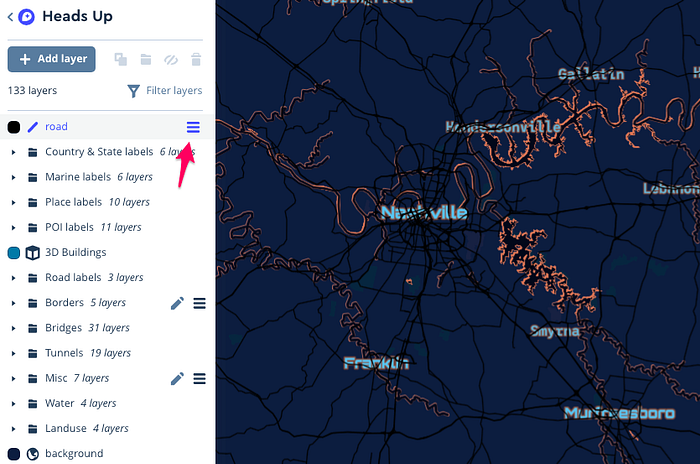
A great Studio feature is bulk editing, which allows you to edit multiple layers as a collection. This is super convenient for this task because we need to hide all 24 road layers in Rasagy’s original style, like this:

Let’s also hide the Bridges and Tunnels folders with the same method:

Notice the carrot (>) to the left of the folders, which allows you to collapse and expand the layers. Pro tip — the next time you need to create a folder, simply select multiple layers (click + shift) and use the keyboard shortcut g . Voila!
2. Create a road network with a single new layer
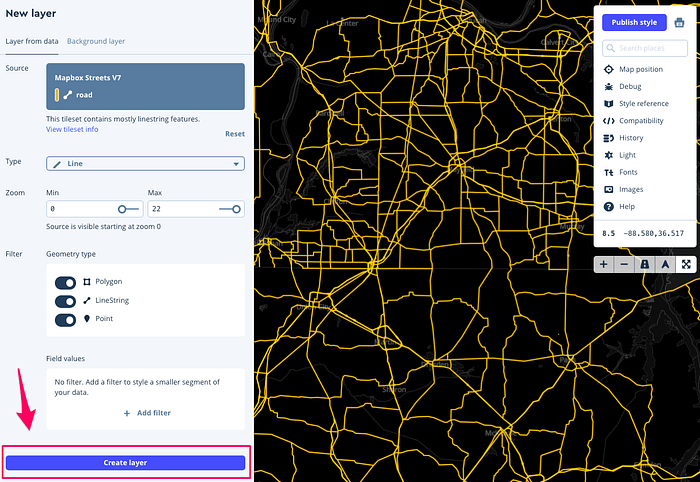
To create a new layer, click + Add layer at the top of the layers panel. You’ll see what looks like “X-Ray” mode of all the data layers that make up Mapbox Streets vector tiles, with the option to add additional sources like Terrain RGB (a digital elevation model), Mapbox Satellite (imagery) and your own custom data.
Click on a section of roads (yellow) and choose select for the Mapbox Streets v7 road layer:

Click create layer to add the roads to your style. If you’re interested to learn more about the attributes and options on this page, see this section of the Studio Manual.
You can also use this method to add separate layers for bridges and tunnels by using Filters in the select data section. For simplicity, I’m just working with roads on the first pass.
3. Adjust the order of the new roads layer
New layers are added to the top of your layers list — notice how they’re also on top of my labels and rivers on the map canvas below. To maintain hierarchy of how the layers appear in the style, select the roads layer and drag it down on your layers list, directly under the road labels layer:
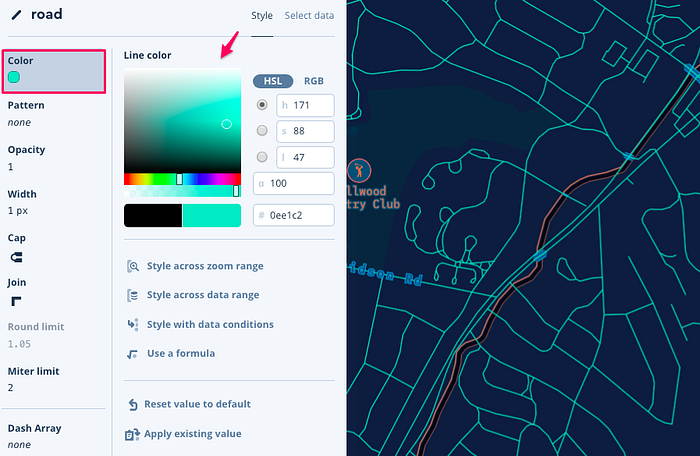
4. Style the color of the roads
To change the roads from black to any color of your choice, select the roads layer by clicking on the layers list (left bar) or click on a road within your map. Then choose a color:
Before we make adjustments to the width of the lines that make up the road layer, zoom out for perspective on how the roads look out of the box. Since it may be helpful to visualize a large city’s road network while you edit, use the search box on the toolbar (powered by the Geocoding API) to head to a city like Berlin, Sydney, or NYC:

5. Style the width of the roads by class
Let’s start working on the width of our road network by selecting the Width property for the road layer. Choose Style with data conditions which allows us to define logical statements (expressions) that resolve to truth or false, and if true, apply a particular style.
Select class as your data condition:

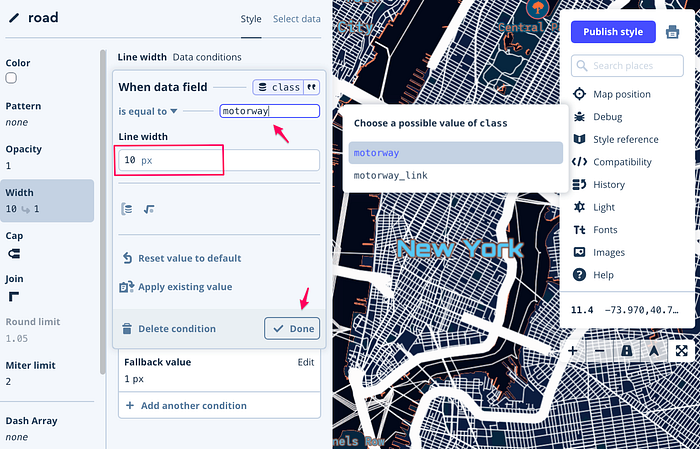
6. Set line width data conditions for motorway class
We’ll start by styling a single class of road — type motorway in the field for when class is equal to and select motorway from the dropdown.
7. Style line width by zoom range
Once you click done above you’ll be presented with an option to Style across zoom range, which allows the developer to set rules that will change your map style as the user zooms in and out:
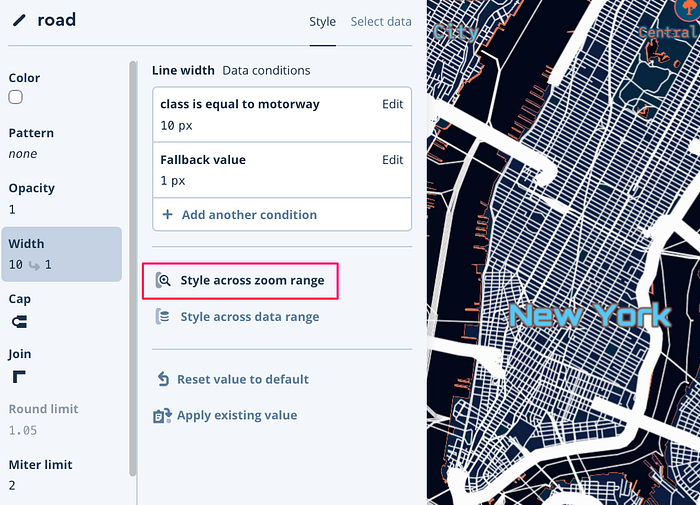
Let’s set the zoom level to 10, the line width to 1 px, and the fallback to 0 px for motorway class:
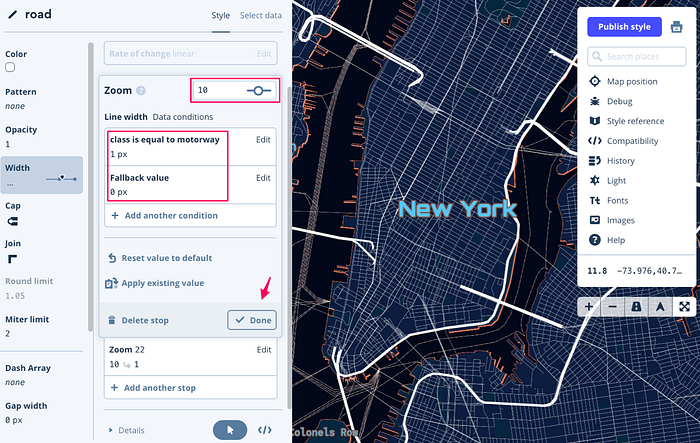
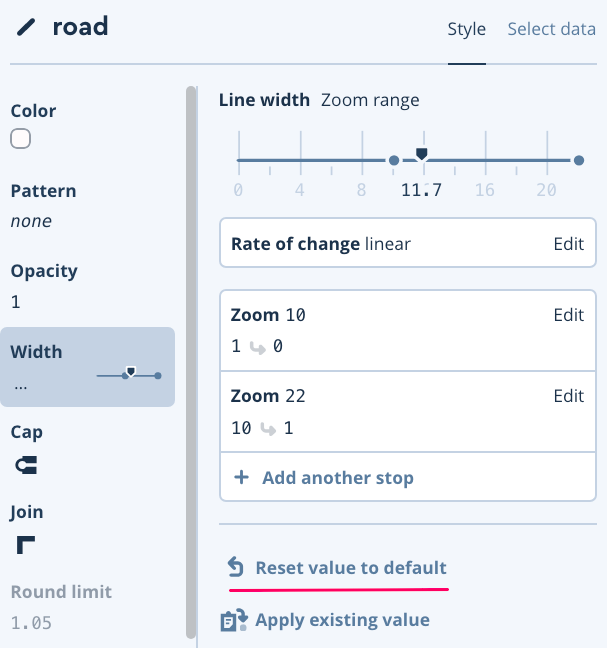
Here’s how your zoom ranges should look after the above change. Notice the reset value to default button offers a chance to revert your changes, as does the history popup on the toolbar.
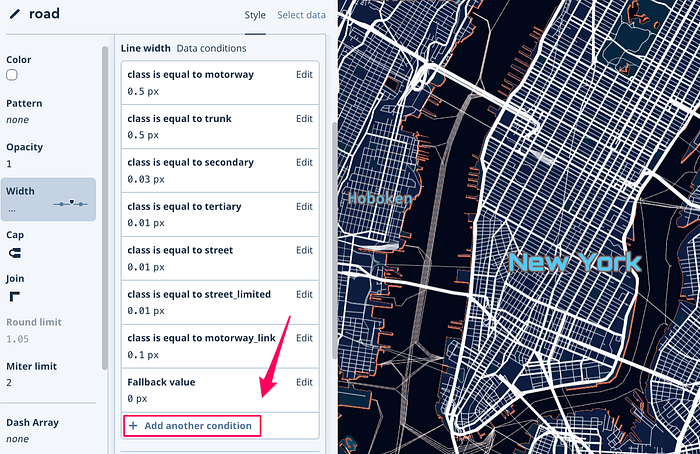
8. Extend styling by zoom level across road classes
So far we’ve only styled motorways, but there are almost 20 classes of roads within the Mapbox Streets vector tile spec. To begin, let’s set the rate of change to exponential with a base of 1.5:

Notice if you continue adding more classes of roads, your zoom levels will look like this ^
To include additional classes, click into the zoom level and select add another condition to introduce styling to to classes like trunk, secondary, and street as shown below:
Customize and share your work
Nicely done! You’ve used the power of expressions in the latest Studio release to style an entire road network as a single layer, adjusting both road width and zoom level.
You’ve earned some stickers for completing this challenge — just share some rad screenshots with #mapwithmapbox and tag @Mapbox so we can hook you up! Ready for more? Check out Rasagy’s advanced guide.